Latest Posts

Orange-Ginger Creamsicle Dream Smoothie

This smoothie is so simple to make and ridiculously delicious!  It tastes so good, you’ll think it must be bad for you, but actually it’s filled with fiber, vitamin C and a dose of healthy fats. Ginger is known to stimulate the metabolism, boost the immune system, and soothe the tummy, so it’s a wonderful thing to drink in first thing in the morning. The creamy orange flavor always brings me back to childhood and puts a smile on my face, which is a very nice way to start the day. Enjoy!

Ingredients: 1-2 Servings

2 Navel Oranges, peeled and broken into segments
1 heaping tsp Ginger, chopped
1/4 cup Cashews, preferably soaked 2-4 hours 
1 Medjool Date, pitted
6 Ice Cubes (about 2/3 cup)

Blend everything except the ice until smooth in a high-speed blender*. Add ice and blend again.


*If you don’t have a high-speed blender you can add 1/4 cup water to get the blades to turn, omit the fresh ginger and use a pinch of powdered ginger instead. The texture will be grainer than in a high-speed blender, but the flavor will still be great.

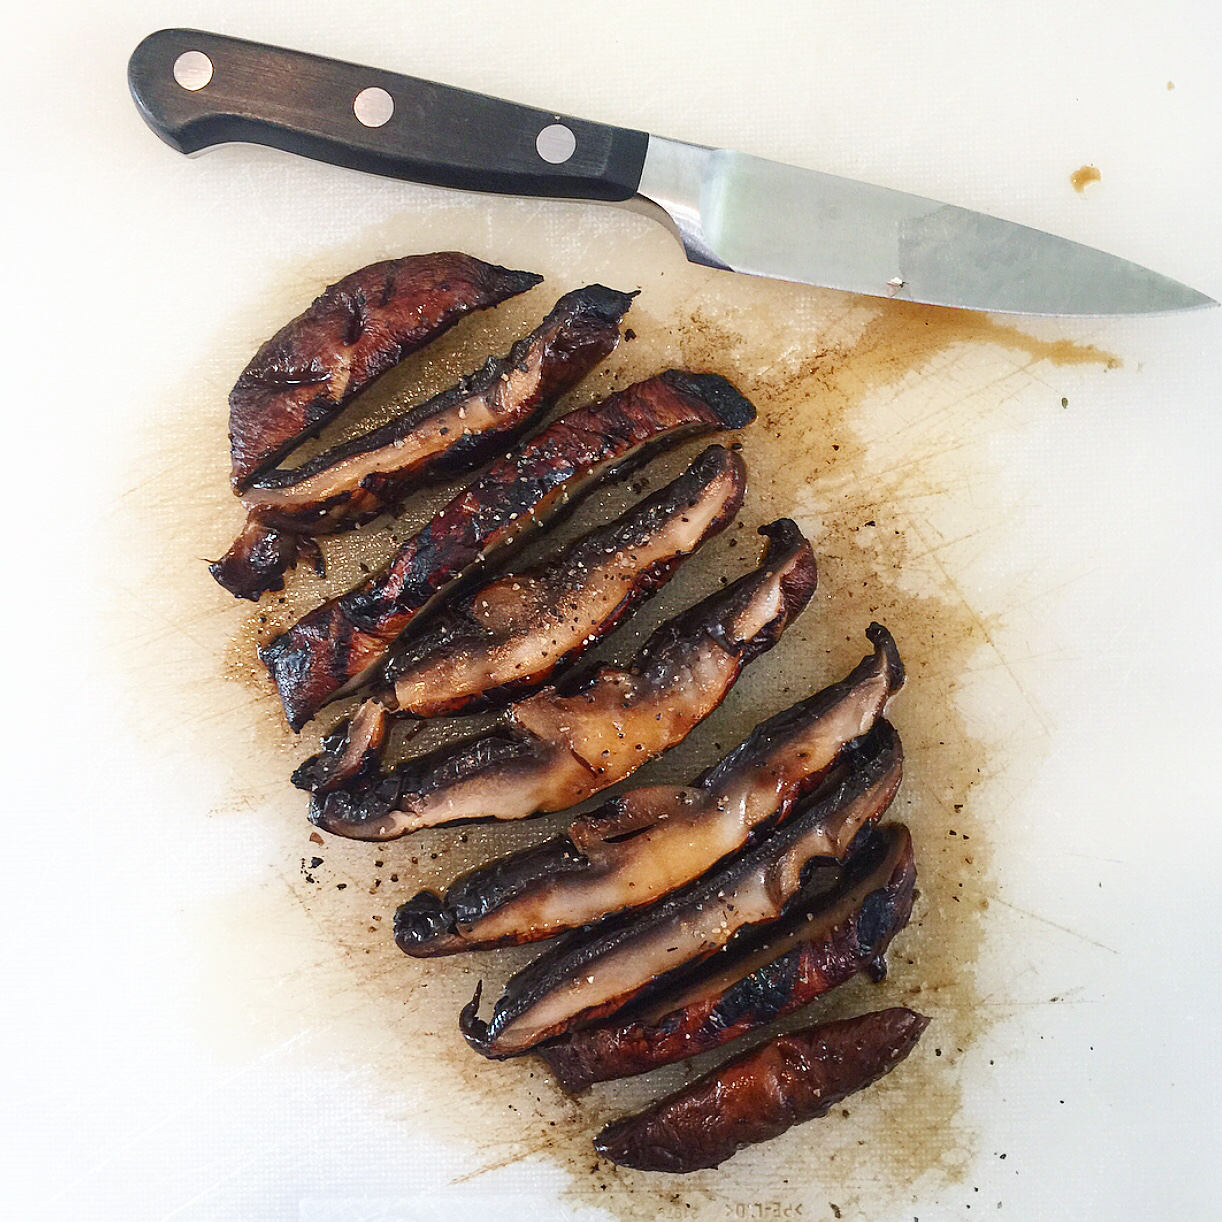
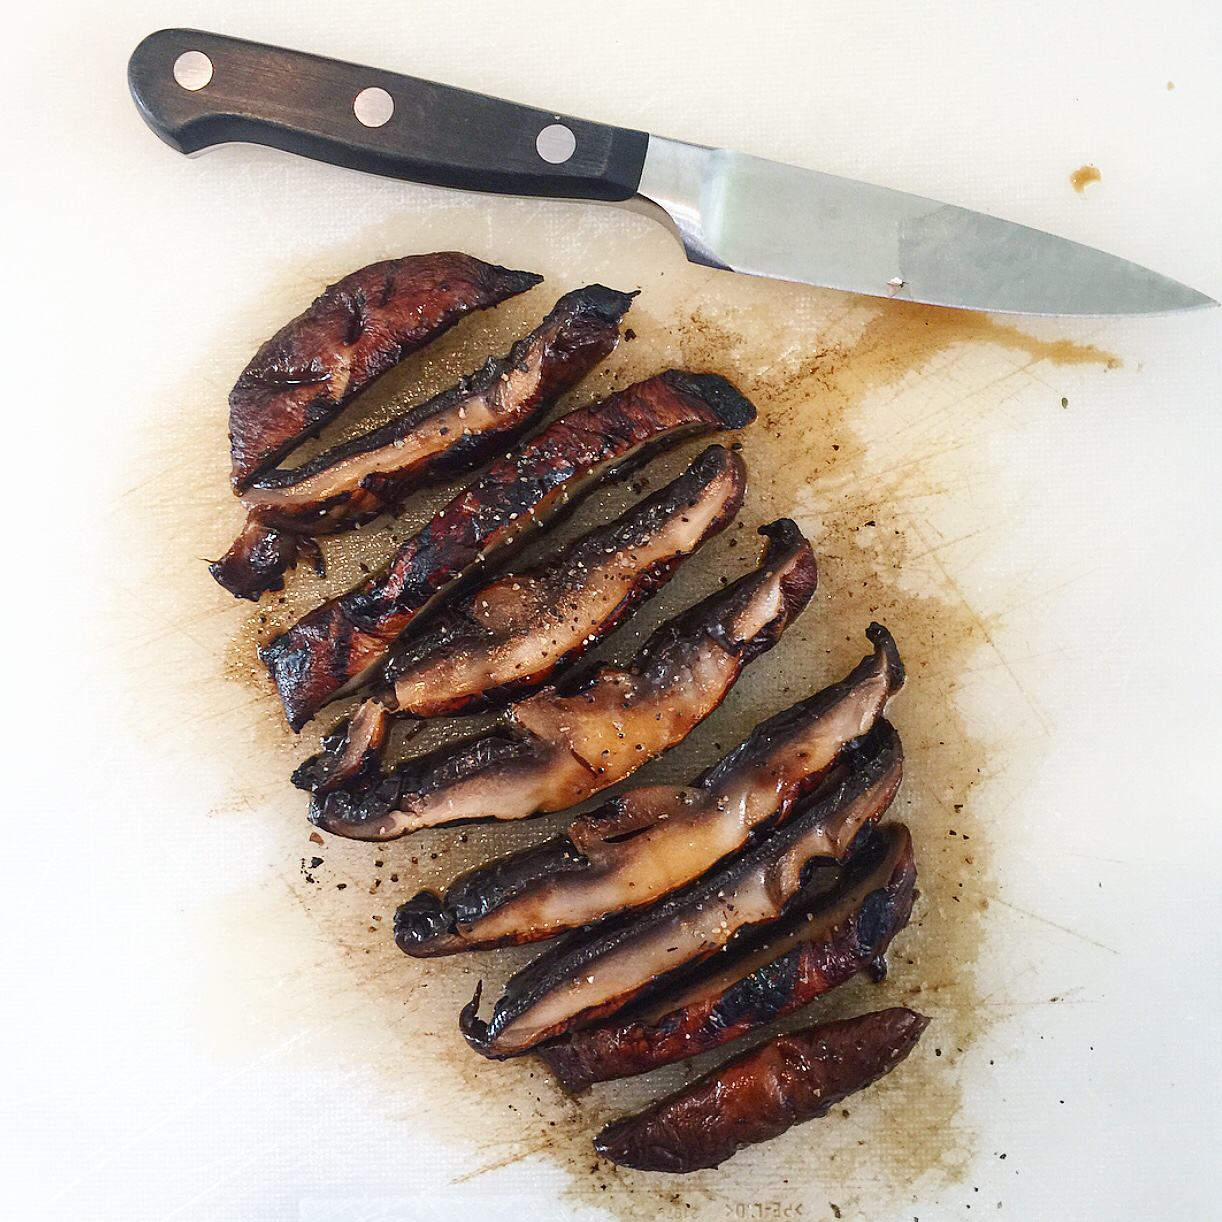
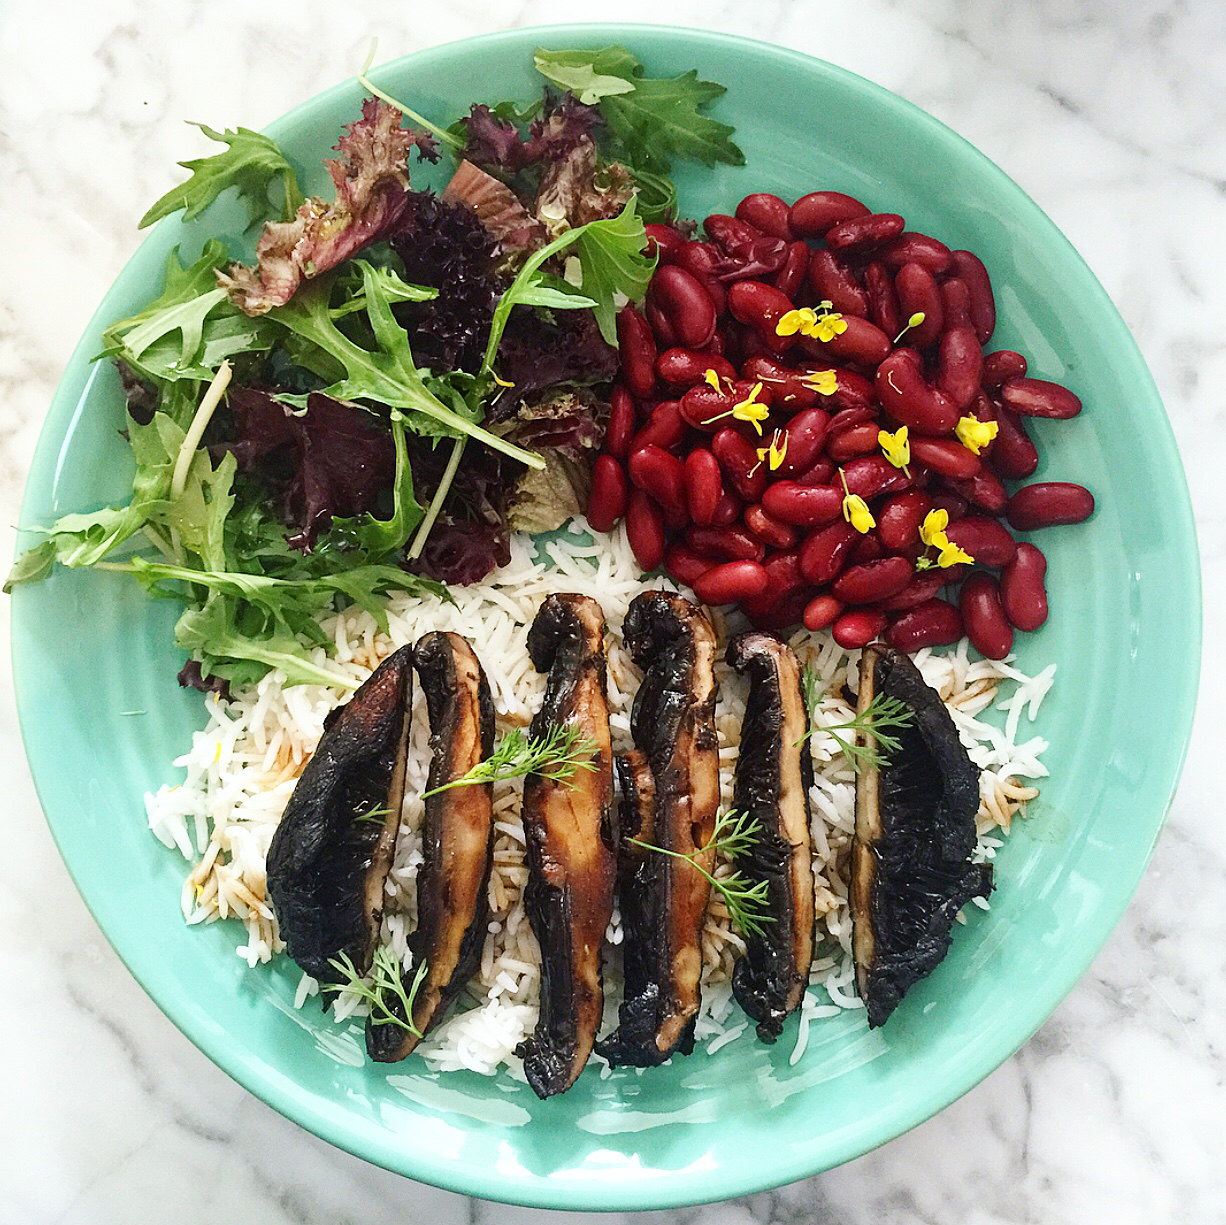
Meaty Grilled Portobello Mushroom Steaks

  These grilled mushrooms make a satisfying and savory centerpiece to any meal. They are both low-calorie and immune boosting. Try them sliced on top of salads, your favorite bowl or as a taco or sandwich filling. I like to serve them with rice and beans so you get the meaty flavor from the mushrooms and lots of protein too. Enjoy!  


Ingredients:

2 Tbsp Olive Oil
1 Tbsp Balsamic Vinegar
1 Tbsp Tamari or Soy Sauce
1 tsp Dijon Mustard (preferably grainy)
Big pinch dried Rosemary
Tiny pinch Garlic Powder
2 Large Portobello Mushrooms

In a small bowl whisk the first 6 ingredients together. Trim the stem of each mushroom so it lines up with the cap. Dip the mushrooms into the dressing, making sure they are evenly coated. Heat a grill pan over medium for 5 minutes while the mushrooms marinate.

Grill mushrooms whole for 12-15 minutes flipping every 2-3 minutes until tender and juicy. Serve whole or cut into thick slices.

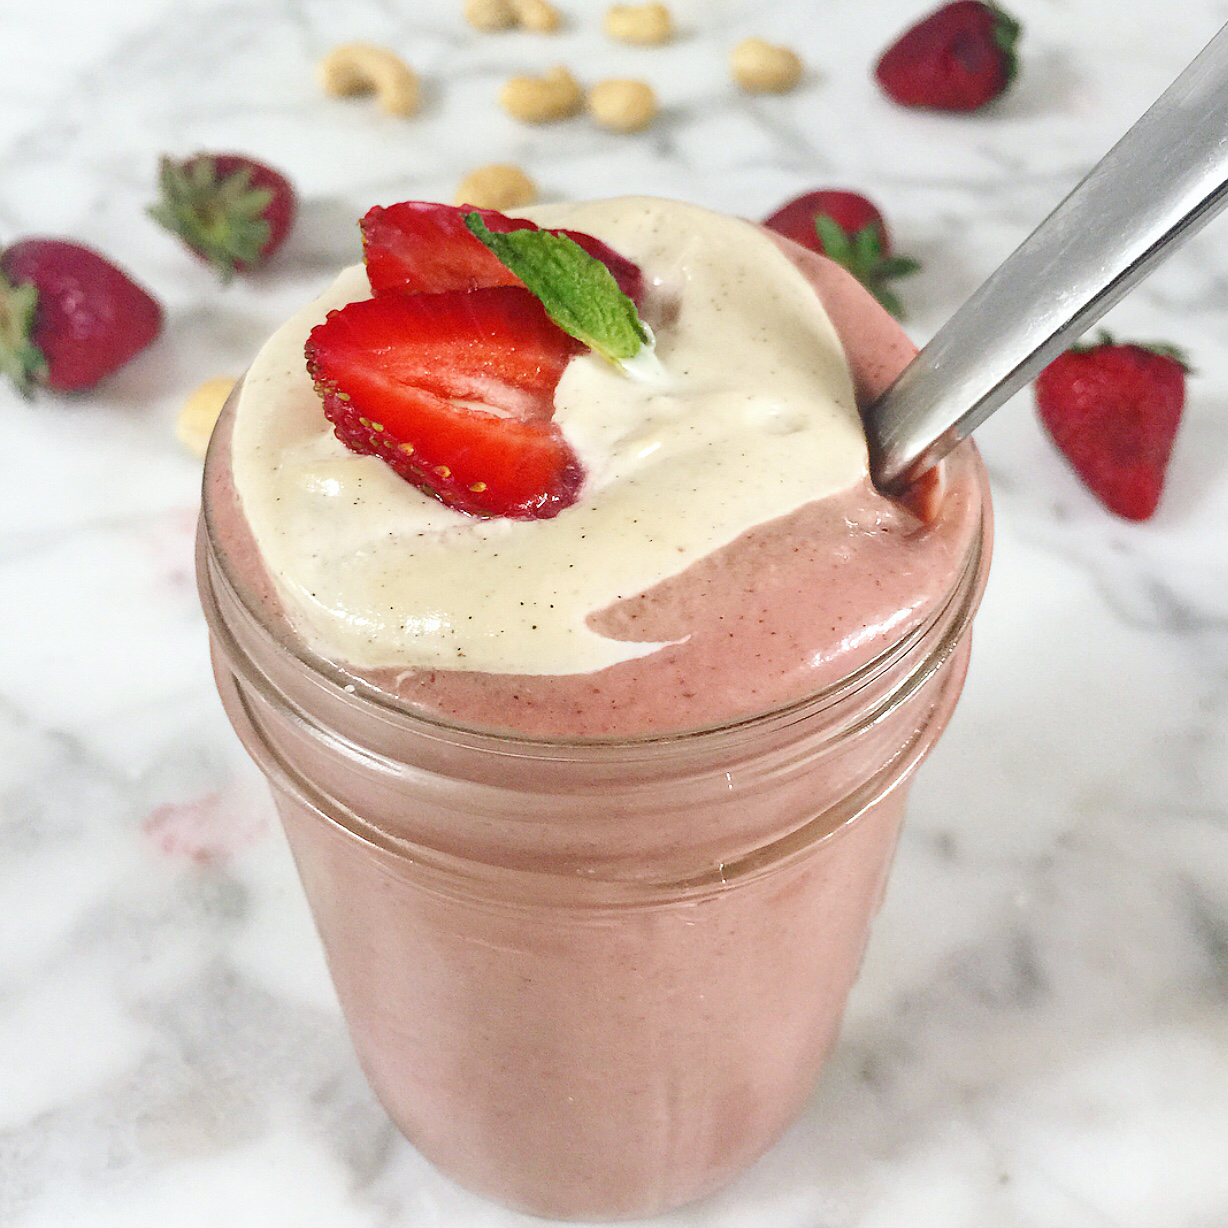
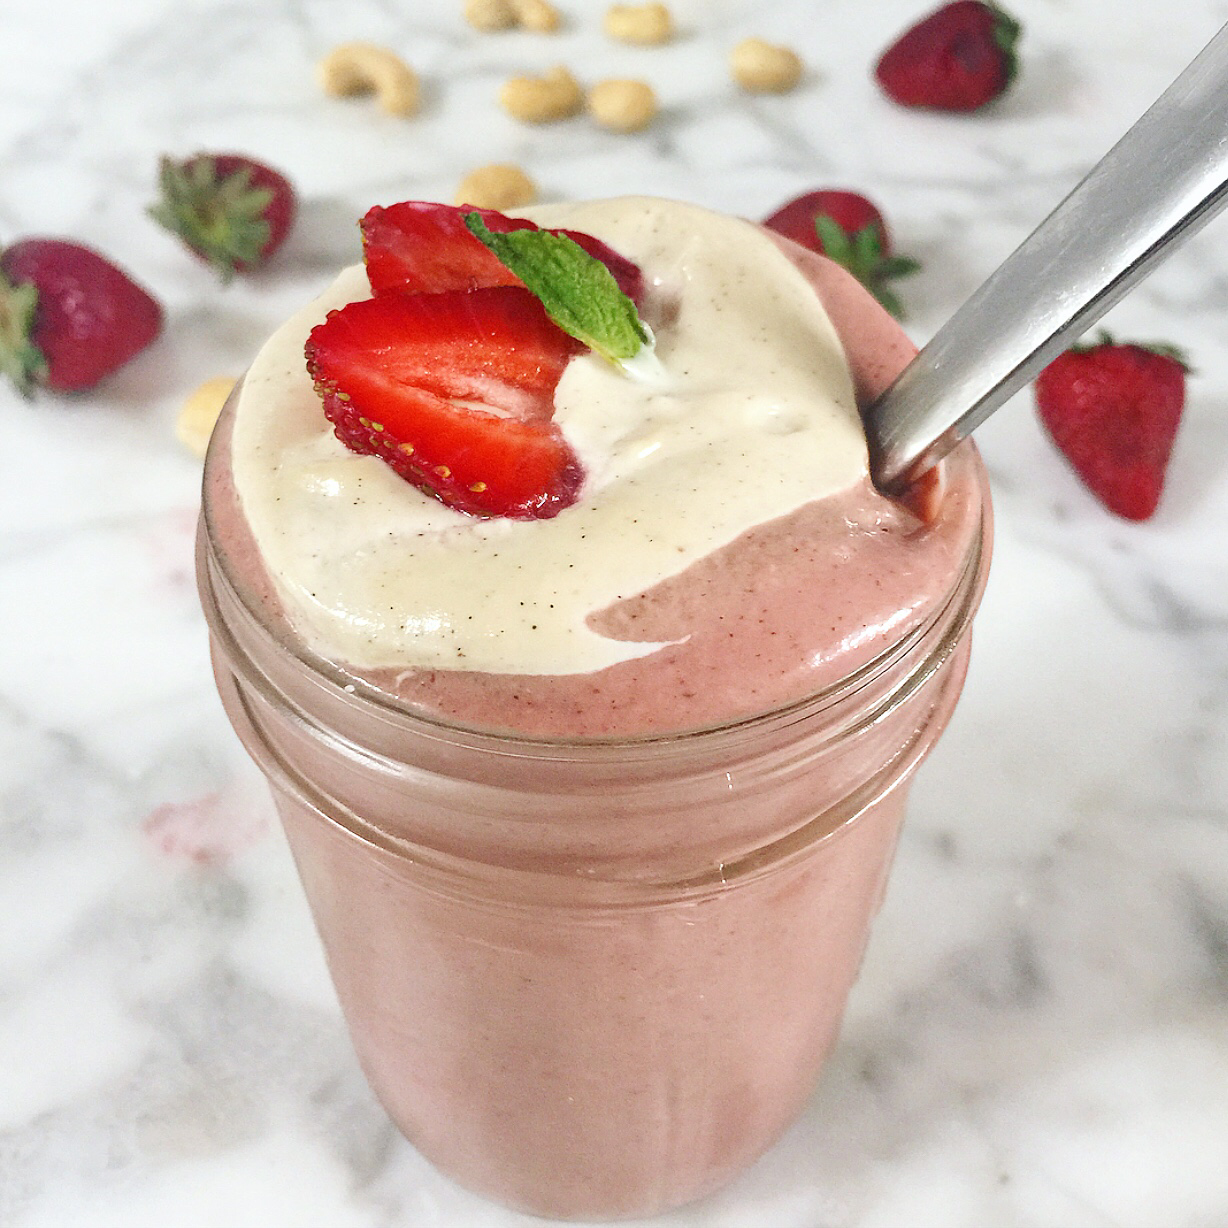
Strawberry Mint Pudding with Vanilla Cashew Cream

Spring  is in the air which means it’s time for gorgeous fresh strawberries! Make the most of these sweet beauties with this refreshing pudding. Mint can help aid digestion making this a great light dessert, but it’s also wonderful in the morning as a breakfast pudding. It’s a thick and creamy change of pace from your typical breakfast smoothie.  Mint is also full of potent antioxidants and a natural stimulant, even the smell is uplifting! So this nutritious whole food pudding will put a smile on your face and a pep in your step.    This recipe makes more vanilla cream than you’ll need for your pudding, but you have to make that much to get the blades of your blender to turn. Good thing it’s so rich and delicious that you’ll be happy to have leftovers! You can use it as a topping on oatmeal, desserts or in smoothies later in the week. Enjoy! xJacq

Ingredients: 1-2 servings

Pudding:

1/2 large or 1 small Avocado
1 cup Strawberries, sliced
1 Medjool Date, pitted
1 1/2 tsp Fresh Ginger, chopped
1/4 cup Fresh Mint, lightly packed
1/4 cup Orange Juice
1/4 cup Raw Cashews, preferably soaked 2-4 hours and drained
1 Tbsp Maple Syrup
6 ice cubes

Vanilla Cream:

1 cup Raw Cashews, preferably soaked 2-4 hours and drained
1/2 Vanilla Bean, end trimmed, or 1 tsp vanilla extract 
1 Tbsp Maple Syrup
1/4 cup Water
tiny pinch Sea Salt

Pudding:

Blend the first 7 ingredients in a high-speed blender until smooth. Add the ice cubes and blend again. Pour into 1-2 small glasses

Vanilla Cream:

Blend all of the ingredients together until smooth, scraping down the sides as needed. If the mixture is too thick add more water as needed for a thinner consistency.

Serve: 

Top the pudding with 1 Tbsp of Vanilla Cashew Cream. Garnish with a fresh mint leaf and a sliver of strawberry. Refrigerate leftover vanilla cream to use later as a topping or in smoothies.

Why I Gave Up Dairy and Why it May Or May Not Be Right For You.

There are lots of factors that may lead someone to go dairy-free. For many it’s in the hope of relieving symptoms of lactose intolerance or irritable bowel syndrome. For others it’s to avoid inflammatory responses like heartburn, lack of energy, and joint pain. Some are trying to lower their cholesterol, others are trying to lose excess weight. If you’re suffering from any of these issues you may want to experiment with cutting it out to see if you feel better.

While those are all great reasons to give up dairy, the catalyst for me was not an upset tummy or bloat, in fact it was not a physical symptom at all. For me it was all thanks to a spunky little goat named Ice Cream. I met Ice Cream, ironically enough, at a cheese making class held at a farm in Alta Dena. In class there was a step-by-step discussion on cheese-making, from choosing the right milk to aging. I also learned a few facts that I found somewhat disturbing. For example, one bottle of commercial milk usually contains milk from hundreds of different cows, and cheese is often made with rennet that comes from the lining of baby calves stomachs. To avoid animal rennet you have to look for cheese labeled vegetarian or Kosher, or that has vegetable rennet listed as an ingredient. This information alone wasn’t enough to put me off cheese eating at the time, however. I happily finished class and envisioned impressing my friends with my mozzarella making skills.

IMG_1570

After class they let us go out into the pen to meet the baby goats. Immediately, one special little guy caught my eye. He had knobby knees that wobbled while he walked over to me and bellowed for attention. He had the sweetest little goat face you’ve ever seen! The owner of the farm said his legs had been folded up in the womb and hadn’t developed properly. With permission, I scooped him up and held him in my arms. He looked up at me with those big baby browns and, I don’t know how else to describe it, In that moment…we bonded. Ice Cream had won my heart.

IMG_1569Cut to a couple of weeks later, I was back at the same farm for a class on jam making. Upon arrival I headed out to the corral to say hi to my new friend. There were plenty of goats around but MY GOAT  was nowhere to be seen. I flagged down the owner. “Hi!, where’s Ice Cream?” I asked. “Oh you know, we sold him to a chef who wanted to make soup out of him. Ice Cream was a boy and there’s not much use for boys around a dairy farm.” she replied to my dismay. “For how much?” “Forty dollars.” And with that she turned back to shoveling. It was as simple as that. Ice Cream was gone. My head was spinning. Now I don’t know why it never occurred to me that animals had to have a baby in order to make milk, (after all that’s the way it works for us, duh.) but to be honest, I had never really thought about it. 

And so began a journey of learning about the dairy industry. Here are a few of the unfortunate  facts I came to know along the way about the most common dairy animals, cows-

  •  Like all mammals, dairy cows must be impregnated in order to produce milk. At most commercial farms they are forcibly impregnated by artificial insemination on what the industry calls the “rape rack” every year.
  •  Usually within hours of birth, calves are taken away from their mothers. Calves can become so distressed from separation that they become sick, lose weight from not eating, and cry continuously. The mother cow also shows clear signs of mourning. If the calf is female, she is raised to be a dairy cow like her mother. Male calves are sold for veal. Many people consider veal to be cruel, but they don’t realize that veal production is a by-product of the dairy industry.
  •  Cows in the dairy industry spend their lives in a constant cycle of impregnation, birth, and milking. They are often fed hormones to increase milk production and have just a couple of months of rest between pregnancies.
  • Nearly all cows used for dairy in the U.S. are eventually slaughtered for meat. At an average of less than 5 years of age, exhausted cows are considered “spent” and sent to slaughter, and millions of them are eaten by Americans as hamburger. In a natural setting, a cow can live more than 20 years.

Finding all of this out along with looking at photos of the conditions most dairy cows live in was enough to make me want to give up dairy. Now of course there are some small family farms that treat their animals with more respect, but there are certain realities on a dairy farm and the bottom line is always going to be a factor. Even on nice small farms, like the one where I met Ice Cream, where you can tell they really care about the animals; baby boys are seen as little more than a by-product and must be sold for meat.

I’m not writing to preach that dairy-free is the only way to go. Food issues are complicated. For example a lot of vegan recipes (mine included) sub cashews for dairy. Since cashews only grow in the tropics it means they’re being flown in long distances which of course isn’t great for the environment. Is cashew milk really “better” than say organic milk that comes from a local farm where the animals are pasture raised? That’s not really for me to say. What I think is important is to have awareness about how food is produced and to make the informed choice that feels right for you. For me it means saying “no cheese, please.”, all thanks to a little Ice Cream. xJacq

If you are interested in cutting out or down on dairy, one thing that can make it a lot easier is to know how to make tasty dairy replacements at home, so please enjoy these recipes


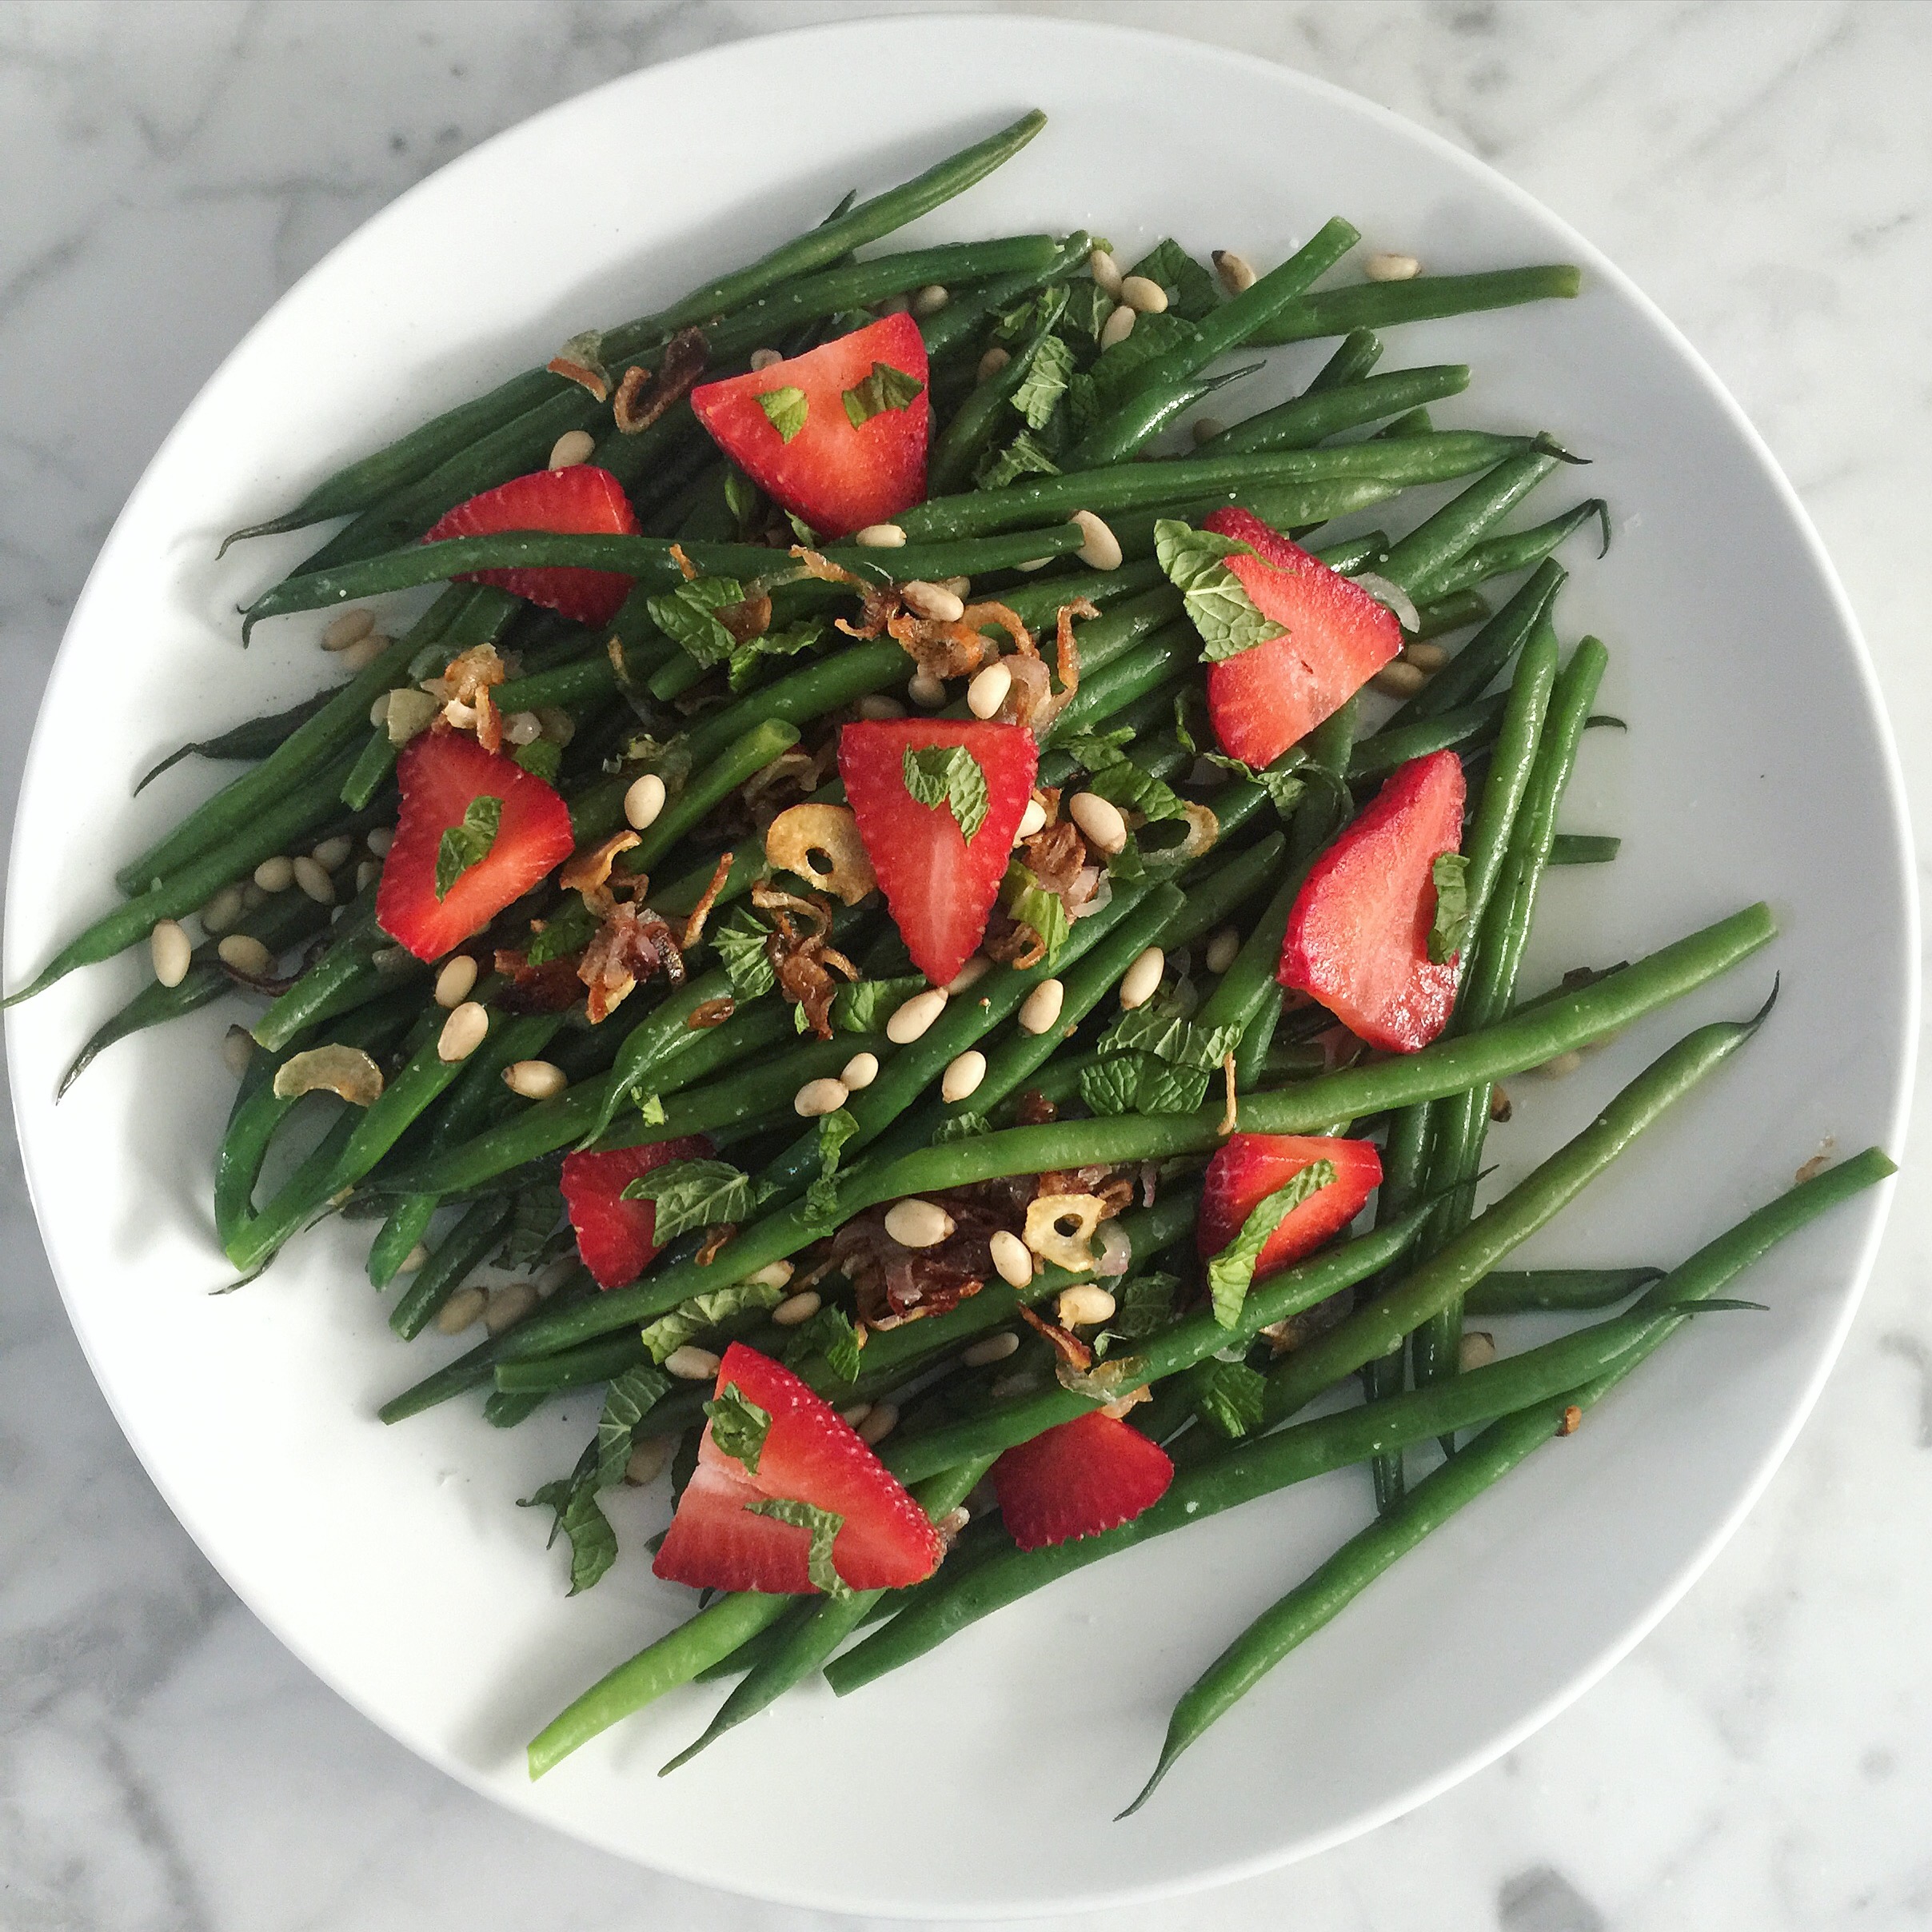
French Green Beans with Caramelized Shallot, Strawberries, Pine Nuts and Mint

Spring has sprung which means strawberries will soon be at their peak. Here they’re paired with french green beans, the skinny, sexy cousin of regular green beans. Also known as haricot vert, they’re longer, crisper, more tender and quicker cooking than their standard counterpart. Green beans and strawberries are both high in vitamins A and C; antioxidants know for their anti-aging properties. This delish dish will keep you feeling bright-eyed and bushy-tailed all season long. Enjoy!

Ingredients: 4-6 Servings
 
2 Tbsp Coconut Oil
1 medium Shallot, thinly sliced
1 lb French Green Beans
1 large or 2 small Garlic Cloves, thinly sliced
1 tsp fresh Lemon Juice (1 lemon wedge)
1 tsp Lemon Zest 
1/4 cup Strawberries, thinly sliced (2-3 berries)
2 Tbsp Pine Nuts
1 1/2 Tbsp Mint, thinly sliced (chiffonade)
Pinch of White Pepper
1/8 tsp Maldon or other flaky Sea Salt (optional)

Add the oil and shallot to a large frying pan and heat over medium until the shallots become translucent (about 2 minutes), lower heat to medium-low and continue cooking, stirring occasionally.

Trim the tops off the green beans. If you are not planning to serve them immediately after cooking, prepare an ice bath.

Fill a pot large enough to hold the green beans 3/4 of the way full with water. Salt the water as if you were making pasta and bring to a boil. The water should be about as salty as the ocean. Once the water is boiling, add the green beans to the water and add the garlic to the shallots. Boil the green beans over medium until they turn bright green and tender but still crisp. This will take about 2-4 minutes depending on their thickness. It is better to err on the side of undercooking since you will finish them in the pan.

Drain the beans into a collander. If you are serving them immediately rinse with cool water, then add them to the shallot mixture and toss to coat, allowing any excess water to evaporate. If you will serve them later, plunge them in an ice bath until cool, then drain and refrigerate; reheat them in the shallot pan just before serving.

Add the lemon juice and zest to the warm green beans and spread onto a serving plate. Top with strawberries, pine nuts and mint. Finish with pepper and a sprinkle of sea salt if desired.


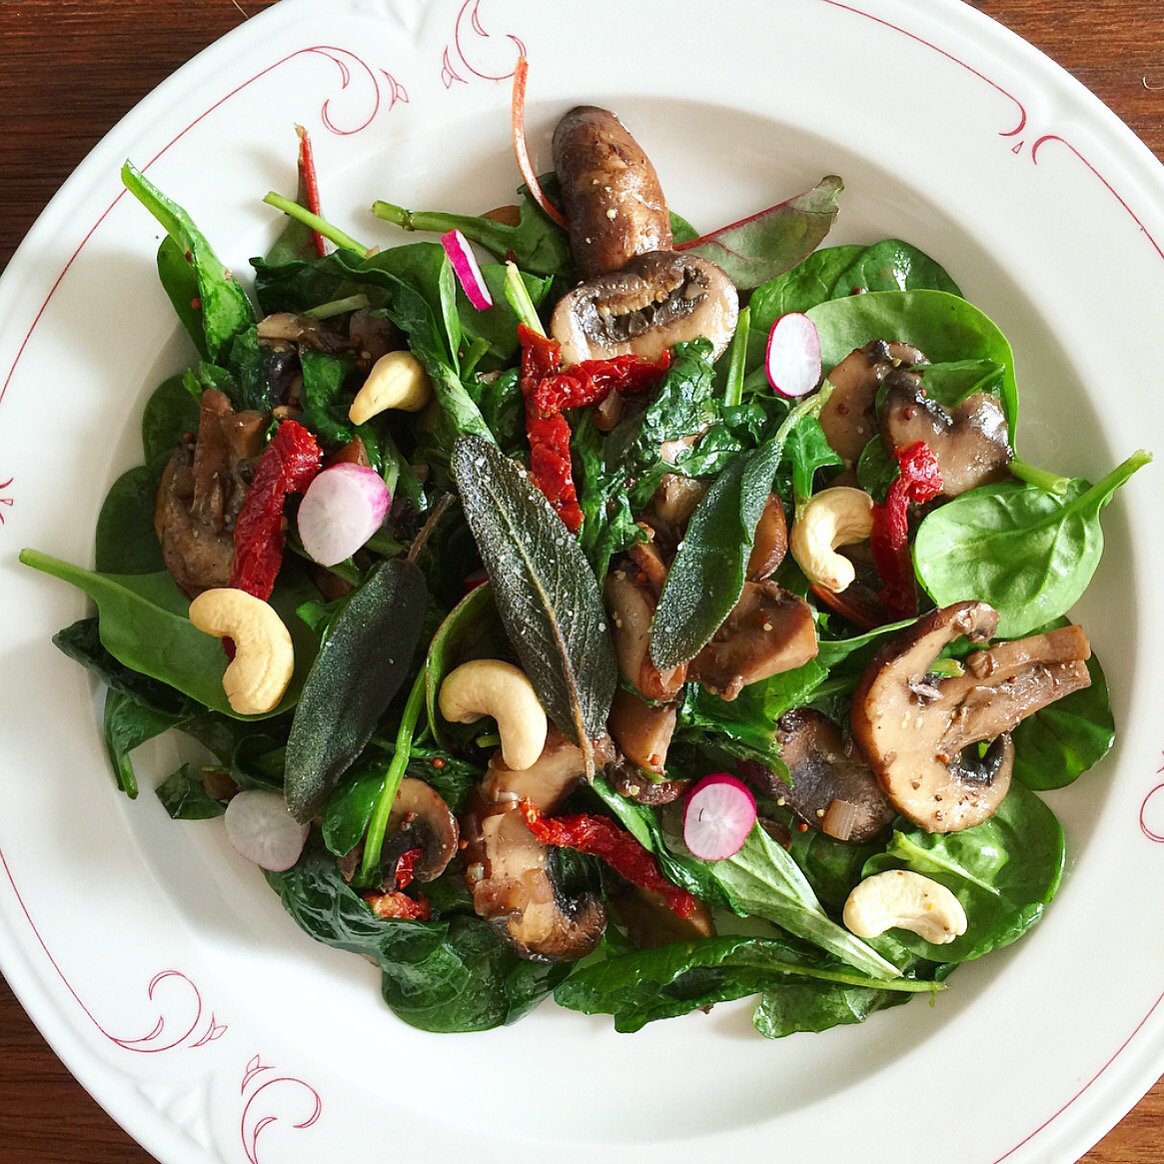
Real Food Fast: Sautéed Mushroom and Wilted Spinach Salad with Cashews and Sun-Dried Tomato

Here is another healthy, flavorful meal you can throw together in 10 minutes or less. I served this with toast topped with protein-rich sage hummus that I made by blending regular hummus with a couple of fresh sage leaves. It was quick, delicious and super satisfying! 

Ingredients:  2 Servings

3 Tbsp Olive Oil, divided
6-8 Sage Leaves
1 Shallot, chopped
1 lb. Button or Cremini Mushrooms, thinly sliced
1 Tbsp Balsamic Vinegar 
1 tsp Dijon Mustard, preferably whole-grain
Sea Salt & Black Pepper
6 cups Baby Greens (spinach, kale and/or chard etc.)
1 Radish, thinly sliced
1/4 cup Cashew, Raw
1/4 cup sun-dried tomato, sliced

Heat a pan over medium-high then add 2 Tbsp olive oil. When hot, fry the sage for 30-60 seconds, if it starts to brown remove immediately from the pan. Use tongs or a fork to transfer the leaves to a plate covered with a paper towel to drain and crisp.

In the same pan add the chopped shallot and mushrooms and cook 5 minutes until the mushrooms have softened. Add the remaining (1 tbsp) olive oil, balsamic vinegar, Dijon and a big pinch of sat and pepper.

Turn off the heat and toss in the baby greens to wilt slightly. Plate and top with the radish, cashews, sun-dried tomato and fried sage leaves.  Enjoy! xJacq


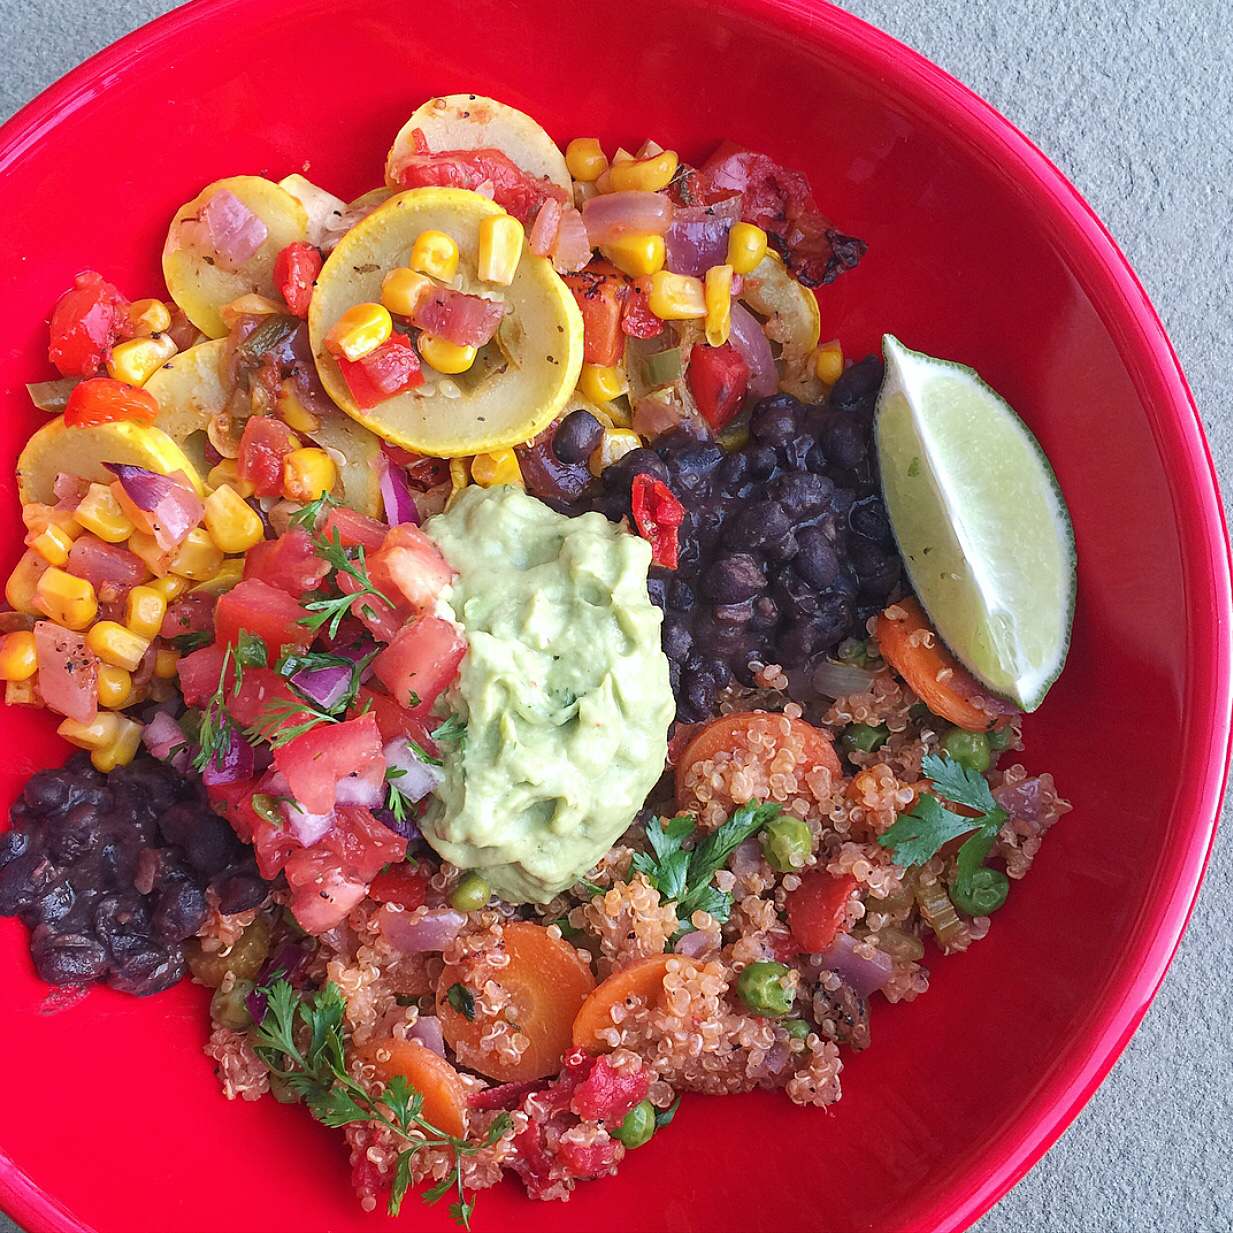
Mexican Quinoa Bowl with Zucchini and Corn, Black Beans and Avocado Cream

Comfort food means different things to different people, but when I think of comfort food the first thing that comes to mind is a big bowl of yummy mexican food. I’m mexican on my mom’s side so family gatherings almost always included fragrant pots of rice and beans simmering on the stove along with some other flavorful and spicy veggies. This recipe is inspired by those meals, but adapted to come together in far less time. While cooking rice and beans from scratch is wonderful, it takes a bit of planning, requiring soaking and simmering for hours. Instead here we substitute quicker cooking quinoa for the rice and canned black beans for the dried version making this easy enough for lunch or a weeknight meal. While this recipe cuts down on time, it doesn’t lose any of the delicious traditional flavor that make it one of my favorites. I hope you love it to! This makes more portions than most of my everyday recipes, but it makes for great leftovers so if you have extra you can use them later in the week as stuffing for a lettuce tacos or a burrito or throw them on a bed of greens for a tasty fiesta salad.
IMG_1065

Ingredients: makes 6 serving

Quiona:

2 Tbsp Coconut or Olive Oil
1/2 Onion, diced
1 Carrot, thinly sliced
2 Celery Stalks, thinly sliced
1/2 can Diced Tomato (preferably fire-roasted)
1 cup Quinoa, rinsed
1 3/4 cups Vegetable Broth
3/4 tsp each Sea Salt & Black Pepper*
1/2 tsp Cumin
8 oz. Frozen Peas (1/2 package)
1/2 cup Cilantro, fresh chopped  

Saute onion in oil on medium until soft and translucent, about 3 minutes. Add carrots, celery and tomatoes and stir until most of the liquid from the tomatoes evaporates, about 3 minutes more. Add the quinoa and toss to coat with the vegetable mixture, then add the broth and spices. Bring to a boil then lower heat to a simmer (on my stove that’s medium-low). Cover and allow to cook 13 minutes, then fold in frozen peas, re-cover and cook until all of the liquid is evaporated, the quinoa is tender and the grains have tiny tails, about 5 minutes more. Once you check for doneness re-cover and let it sit for a couple of minutes before removing the lid and fluffing with a fork.

Zucchini:

2 Tbs Coconut or Olive Oil
1/2 Onion
1/2 Red Bell Pepper, chopped
1 Poblano or Anaheim Chili, finely chopped
1 tsp Dried Oregano
1/2 can Diced Tomatoes (leftover from the quinoa) 
2 Zucchini or Yellow Squash, cut into 1/8 inch thick coins
2 Garlic Cloves, thinly sliced
Handful Fresh Cilantro Leaves
Sea Salt & Black Pepper 

Add oil, onion, peppers and oregano to a wide bottom pan and sauté over medium until the onions are soft and translucent, about 3 minutes. Add garlic and cook 30 seconds more, then add tomatoes, zucchini and a pinch of salt and pepper. Toss ingredients, then lower to medium-low and cover, leaving the lid partially ajar to let steam escape until the zucchini have softened. Sprinkle with cilantro leaves and season to taste with sea salt and freshly cracked black pepper.

Beans:

1 Tbs Coconut or Olive Oil
2 Garlic Clove, minced
2 Cans Black Beans
1/2 tsp cumin
Sea Salt & Black Pepper

Saute garlic in oil over medium heat for about 30 seconds until fragrant then add beans, cumin and a big pinch of salt and pepper. Lower heat and let simmer for a couple of minutes until warmed through.

Serve With:

Avocado Creme (click for recipe) 

Quick Pico De Gallo:

1 Medium Tomato, diced
1/4 Jalapeño, de-seeded and minced
1 inch wedge Onion, finely chopped
1/2 Lime
Sea Salt & Black Pepper

Mix the tomato, jalapeño and onion. Squeeze the juice from the lime over top. Sprinkle with salt and pepper and toss. Enjoy!


Happy Anniversary to Us! Lessons from the first year and a Valentine’s Giveaway!

No my husband didn’t propose on Valentine’s. The “us” in the headline is you and me! It’s been a year since I started The Feel Good Kitchen and I wanted to write a bit about what I’ve learned, what’s to come, and announce our first giveaway. These lessons are in regards to blogging, but I think they can also apply to other businesses, projects or relationships which is why I wanted to share.IMG_5784

1. Commitment is Key- I dabbled in blogging for a couple of years before I started The Feel Good Kitchen. I never really gained any traction or audience before now because I wasn’t taking it seriously. If you don’t believe what you are doing is important, no one else will either. Why would people think my content had special value if I didn’t feel that way myself? Since I started FGK things have grown relatively quickly because I am committed to sharing healthy recipes and a lifestyle that has been life-changing for me. It’s a lot of work and there is still room for improvement, but it’s been so worthwhile because I am passionate about what I’m writing about. I love that we are starting to build a community of people who want to feel their best through healthy eating and an active lifestyle; who believe that eating well should be delicious and taking care of yourself should be fun.

When I was writing before FGK, I was writing about things that I thought people wanted to read instead of what I actually cared about. I wrote decadent recipes and even posted meat dishes that I would never eat myself! No wonder why I couldn’t stay consistent. I hadn’t made the commitment to do the day-to-day work needed to keep a decent blog running because I didn’t have the right motivation, which brings me too…

2. Have A Purpose- Everything changed when I decided to write about the healthy everyday foods that I use to feel my best. After years of dieting, counting calories, avoiding fats, feeling low-energy etc. I knew something had to change. After lots of experimentation I found that eating lots of nutrient-dense whole foods and exercising regularly meant I could feel energized, stay slim and ditch the scale. Not having to weigh myself or constantly be on a “diet” gives me a feeling of so much freedom, so of course I want to share! I feel excited every time I work on a new recipe now, or even post a photo on Instagram because I know that it’s inspiring people to eat nutritious foods that make will make them feel great. Having a sense of purpose that isn’t based solely on what you want to get, but more so on what you have to give, will motivate you to stay committed to your work.

3. Be You-In some ways this is the hardest part. Being authentic means you’re putting yourself out on the line. When you’re truly being yourself and using your voice there’s always the fear that people won’t like it, which means (eeek!) they don’t like you. While that feels a little scary, what happens when you come from that place is the people who connect with you are really your kind of people, because they are connecting with your truth. I have a blogger friend who said whenever she loses a follower because of something she posts she just thinks “not my tribe”. It’s a great way to look at things in the online world, and it applies in real life too. Your uniqueness, your voice, your truth is what makes you truly special, it’s what (the right) people will respond to and it’s what makes you stand out. Keeping yourself hidden when you have so much to offer is, let’s face it, kind of greedy, so take the leap, be brave and just be you.

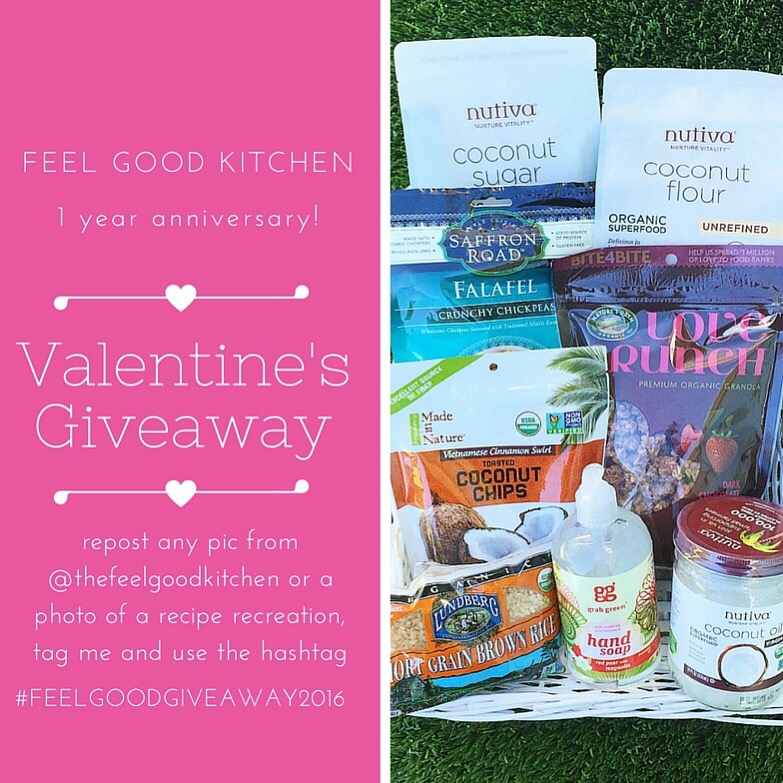
Ok enough blogging/life lessons for the first year I think. Let’s get to the fun stuff- our first giveaway! I’ve had the chance to try a lot of really great products this year and I would love to share some of my favorites with a lucky winner. Head over to Instagram to check out the rules and details. Hurry! The winner will be chosen Wednesday Feb 17th.IMG_0715

This year we’ve built up such a great community on Instagram and Facebook. I’ve just started a YouTube channel and am really excited about starting work on a cookbook with my best friend Abbie Cornish. None of this could be possible without you! So thank you so much for making the first year of the Feel Good Kitchen so wonderful and I’m looking forward to see where it all goes in 2016. Sending you so much love on this Valentine’s Day! XOXO, Jacq


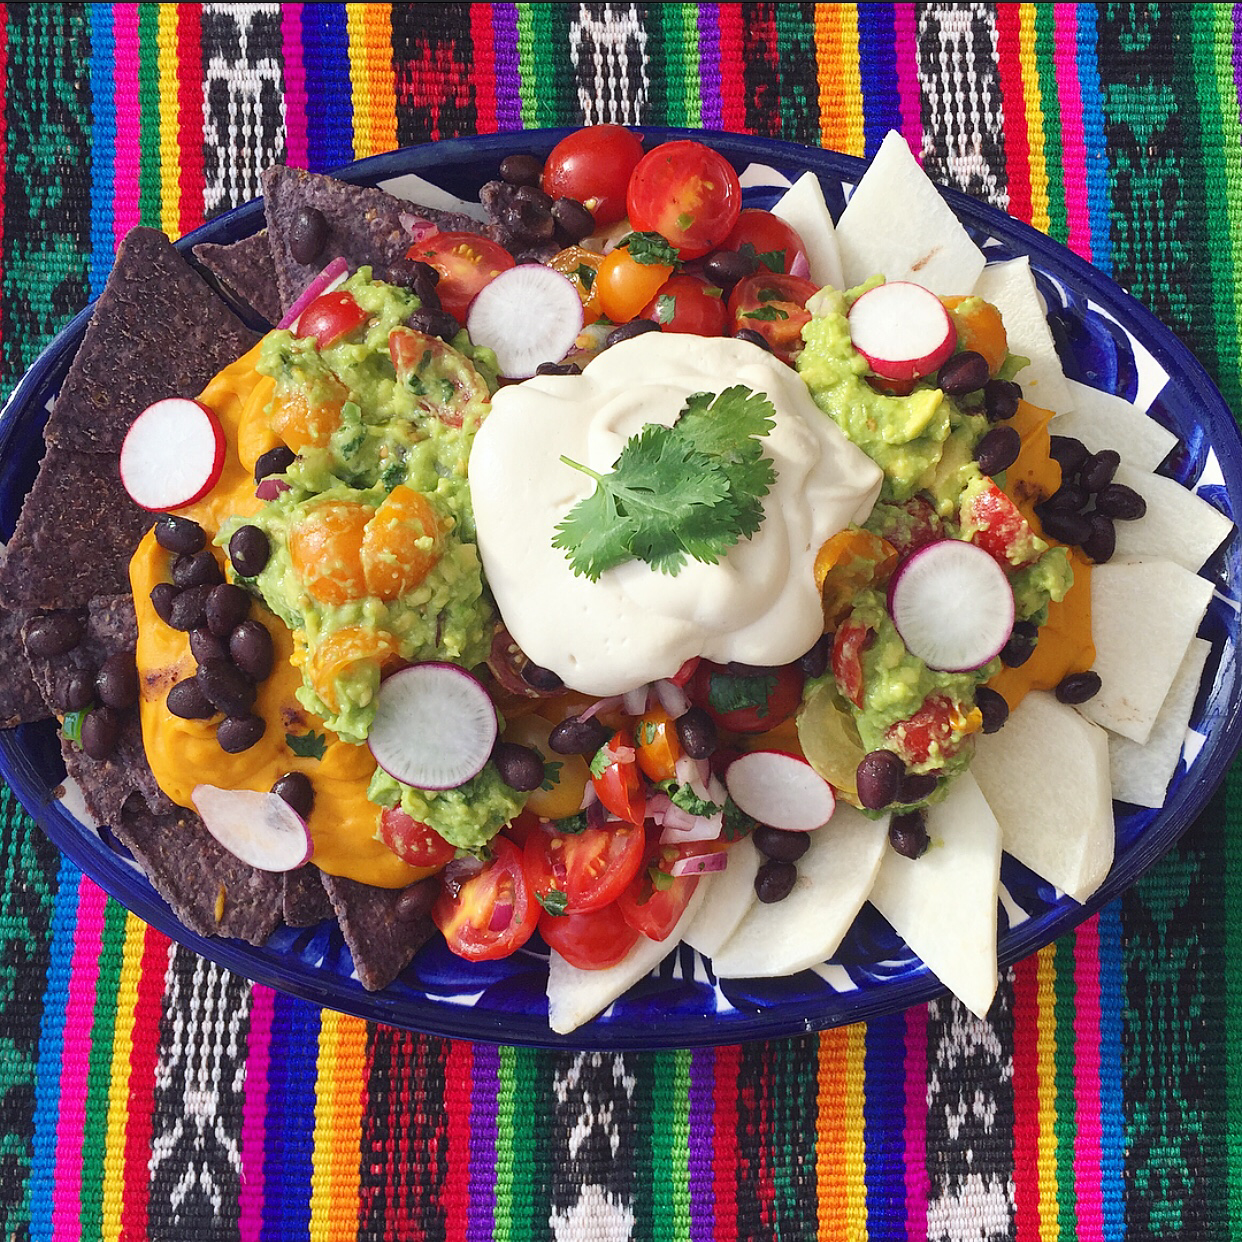
Super Nachos with Gooey Sweet Potato Cheese Sauce (Vegan)


Super Nachos with Gooey Sweet Potato Cheese Sauce (Vegan)

This is my favorite thing to make when people come over to watch football so I wanted to share it in time for the big game! Everyone loves these nachos and people always ask for the recipe. They are fresh, flavorful and satisfying without being too heavy or greasy. They’re packed with veggies and other wholesome ingredients so they’re super healthy, but still rich and filling. I make a couple of plates of these, one of my big party platters, and big bowls of popcorn sprinkled with truffle oil, sea salt, black pepper and nutritional yeast. This simple menu keeps everyone happy and since you can make most of it ahead of time, you won’t have to spend the whole game in the kitchen. Enjoy! xJacq

Super Nachos with Gooey Sweet Potato Cheese Sauce (Vegan)

Ingredients: Serves approx. 6

Cheese Sauce:
1 Sweet Potato
1/4 cup Raw Cashews, soaked 2-4 hrs and rinsed
1 1/4 cup Hot Water
2 Tbsp Nutritional Yeast
2 Tbsp Tapioca Flour
1 1/2 tsp Apple Cider Vinegar
1 tsp Dijon Mustard
1 Garlic clove
3/4 tsp Kosher Salt
1-2 tsp Sriracha or Hot sauce
Pinch of Cumin or Taco Seasoning (optional)

Pico de Gallo: 
1 cup Tomato, chopped 
1 1/2 Tbsp Onion,finely chopped
1/4 Jalapeño deseeded, minced 
1/2 a lime, juice of 
Pinch of Sea Salt
1 handful torn Cilantro leaves

Guacamole: 
1 Garlic clove 
1 large or 2 small Avocado
1/2 lime, juice of
Pinch of Sea Salt & Cumin
1/2 cup Tomato, chopped
1/4 Jalapeño deseeded, minced
1 1/2 Tbsp Onion,finely diced
1 handful torn Cilantro leaves

Chips:
3-4 cups Organic Corn Chips
1 small Jicama, peeled and cut into chips

Toppings:
1 15 oz.can Spicy Black Beans, drained and rinsed
Cashew Sour Cream
2 Tbs Pickled Jalapeños (optional)
2 Radish, thinly sliced
Cilantro for garnish

Cheese Sauce:

Prick the sweet potato several times with a fork and bake in a 450* oven until easily pierced through with a knife (45 min-1 hr. ) Keep a sheet of foil underneath to catch any drippings.

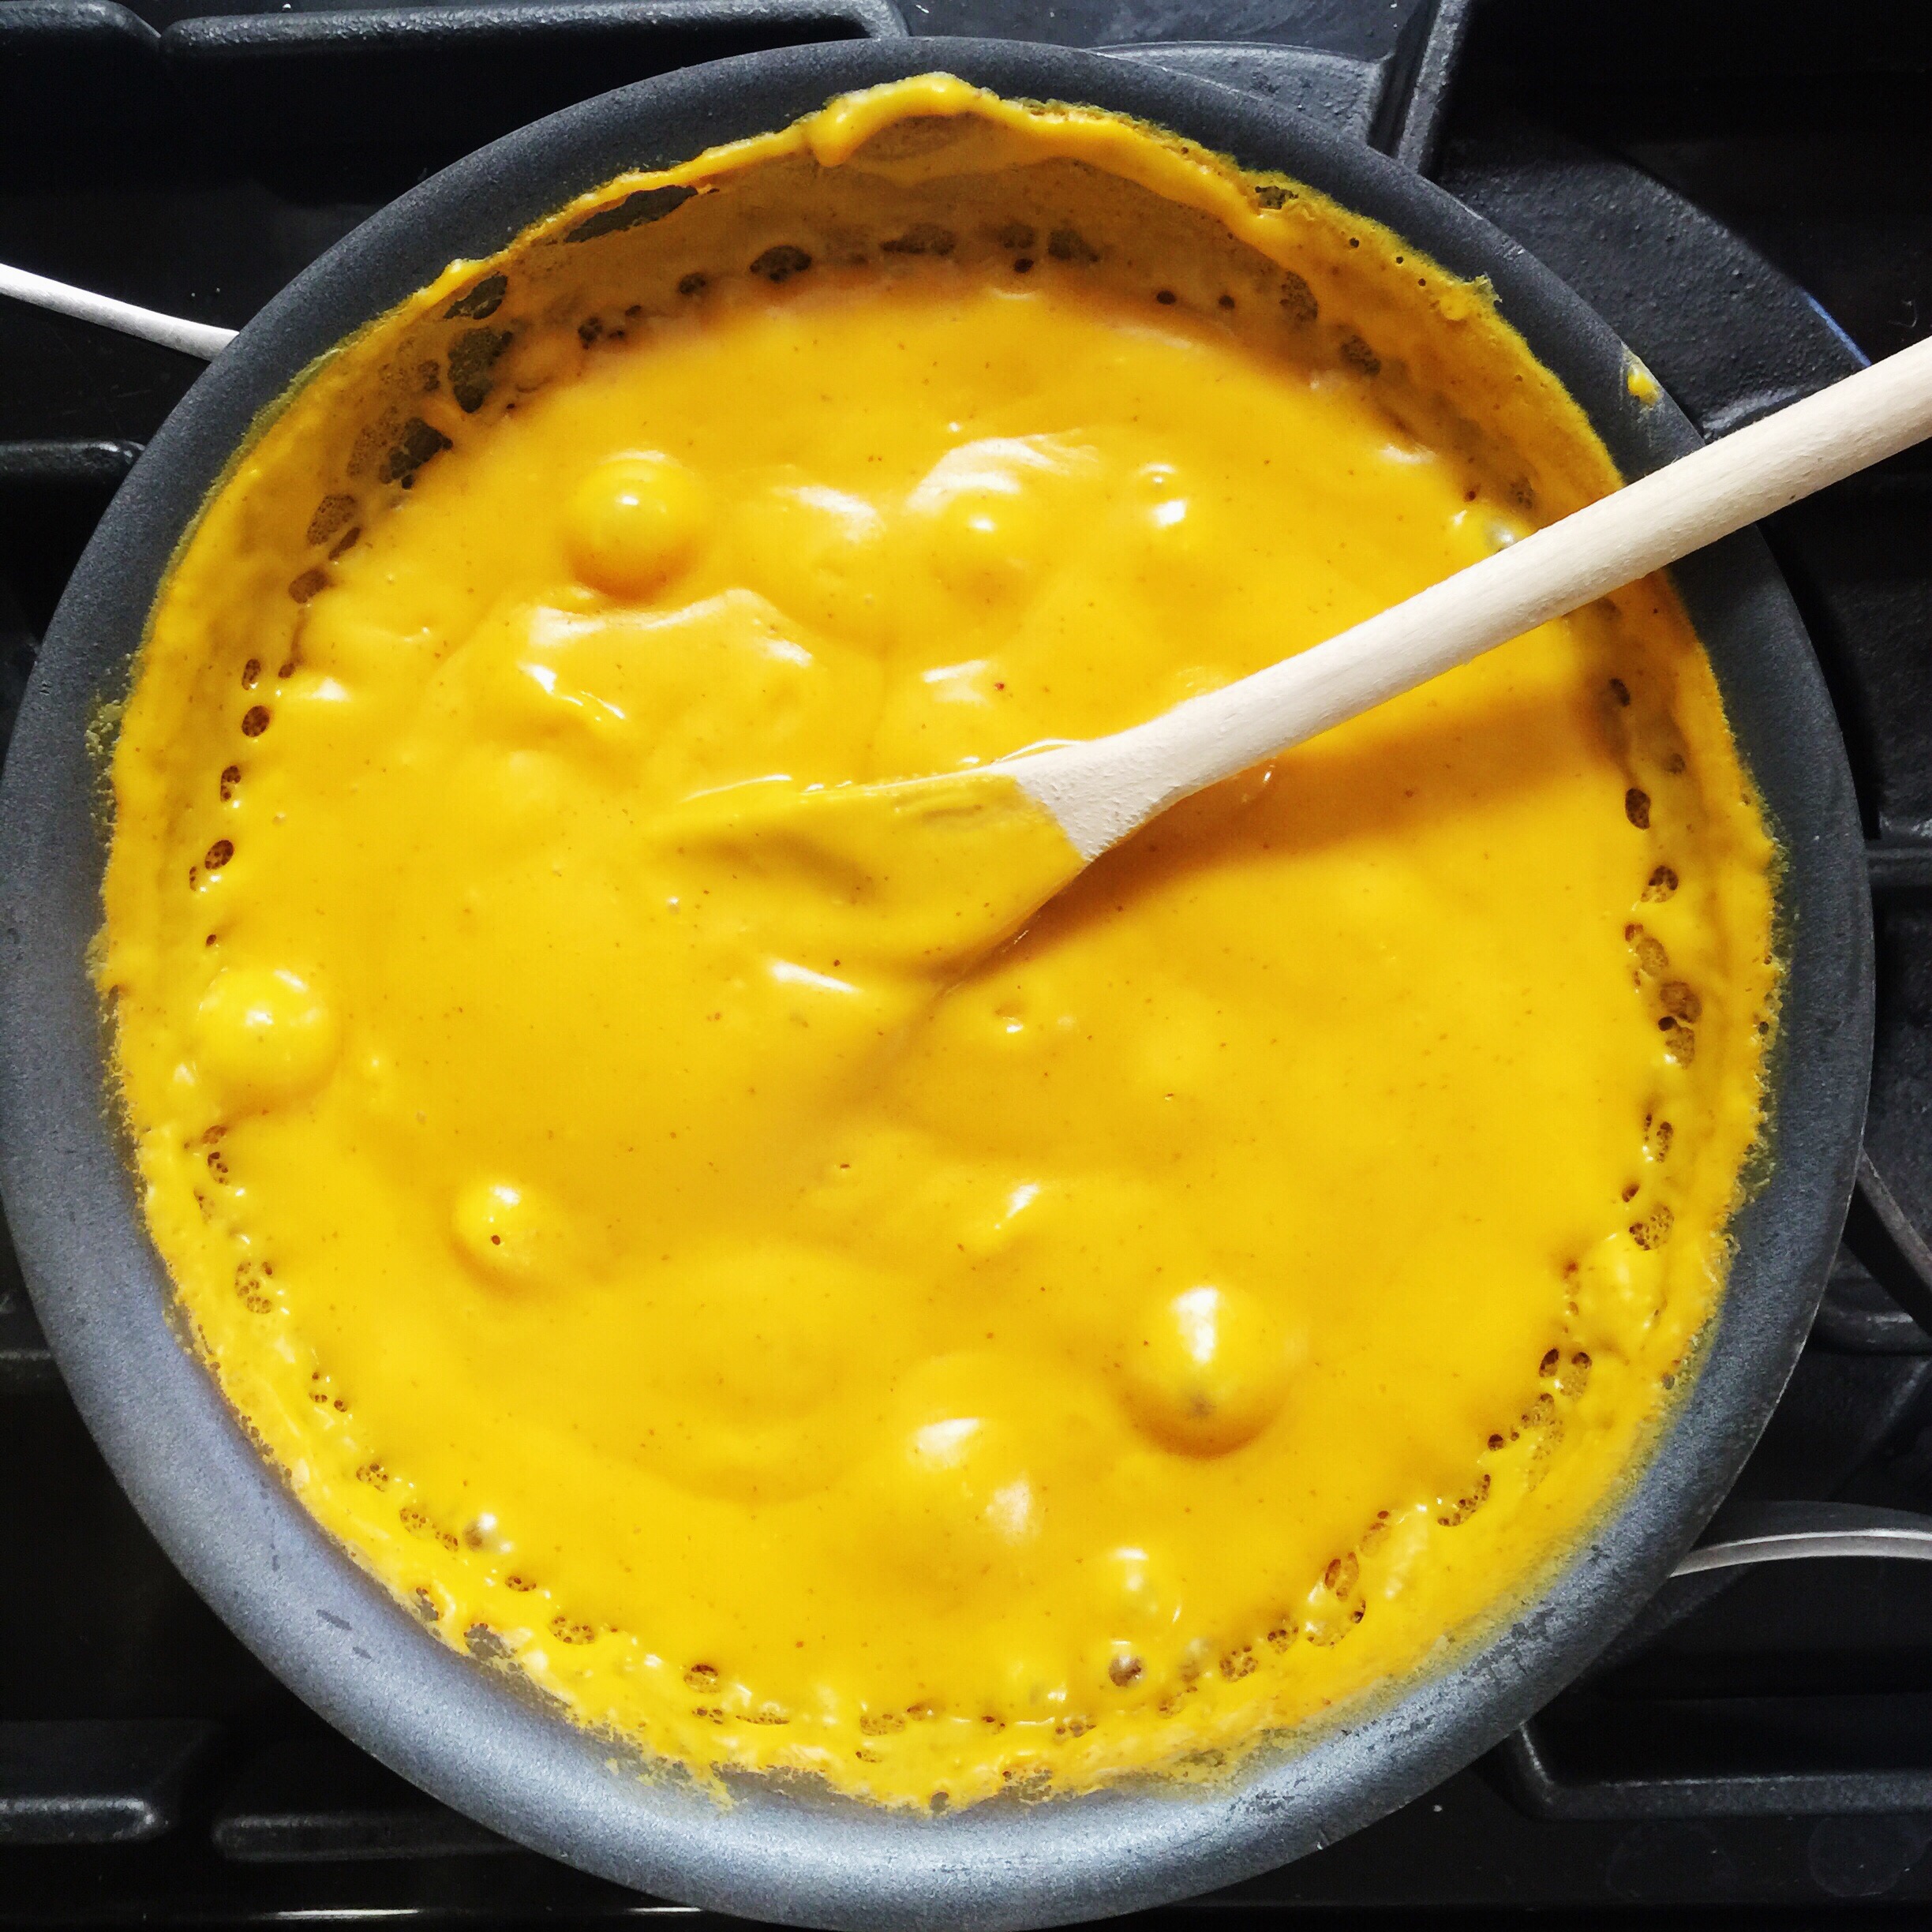
Blend the remaining ingredients in a blender until smooth (1-2 min for a high-speed blender, 5-6 min in a regular blender) When the sweet potato is done, add 1/2 of the cooked sweet potato to the mixture and blend again. If your blender is weak, you may want to use a food processor for this step.

Pico de Gallo:

Toss the ingredients together and set aside.

Guacamole:

Mash the garlic in a mortar and pestle or mince. Mash garlic with avocado, lime juice, sea salt, and cumin with the pestle or a fork. Fold in the remaining ingredients.

Assemble:

Cover a large plate or small platter with 1/2 blue corn chips and 1/2 raw jicama chips. Heat the can of beans on med-low until warmed through. Heat the cheese sauce 2-3 minutes on medium until it thickens, scraping the sides and bottom of the pan with a wood or silicone spoon as you stir.

Pour half the beans on the chips. Top with the cheese sauce, pico de gallo and guacamole. Sprinkle the remaining beans on top. Add a big dollop of cashew sour cream and garnish with cilantro.


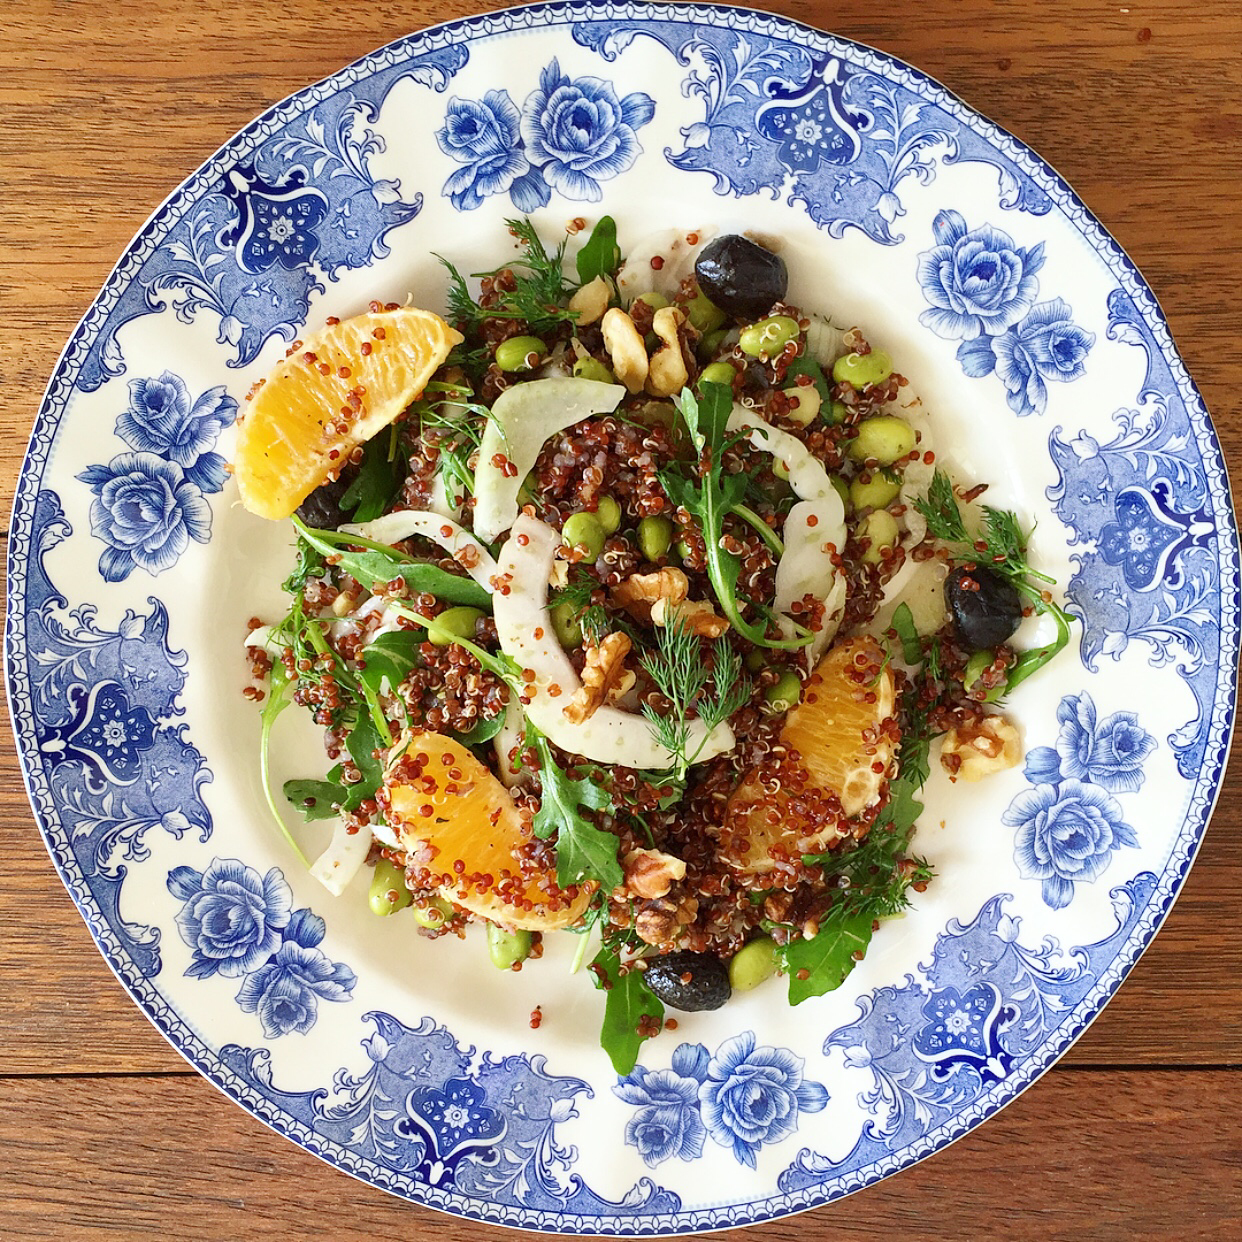
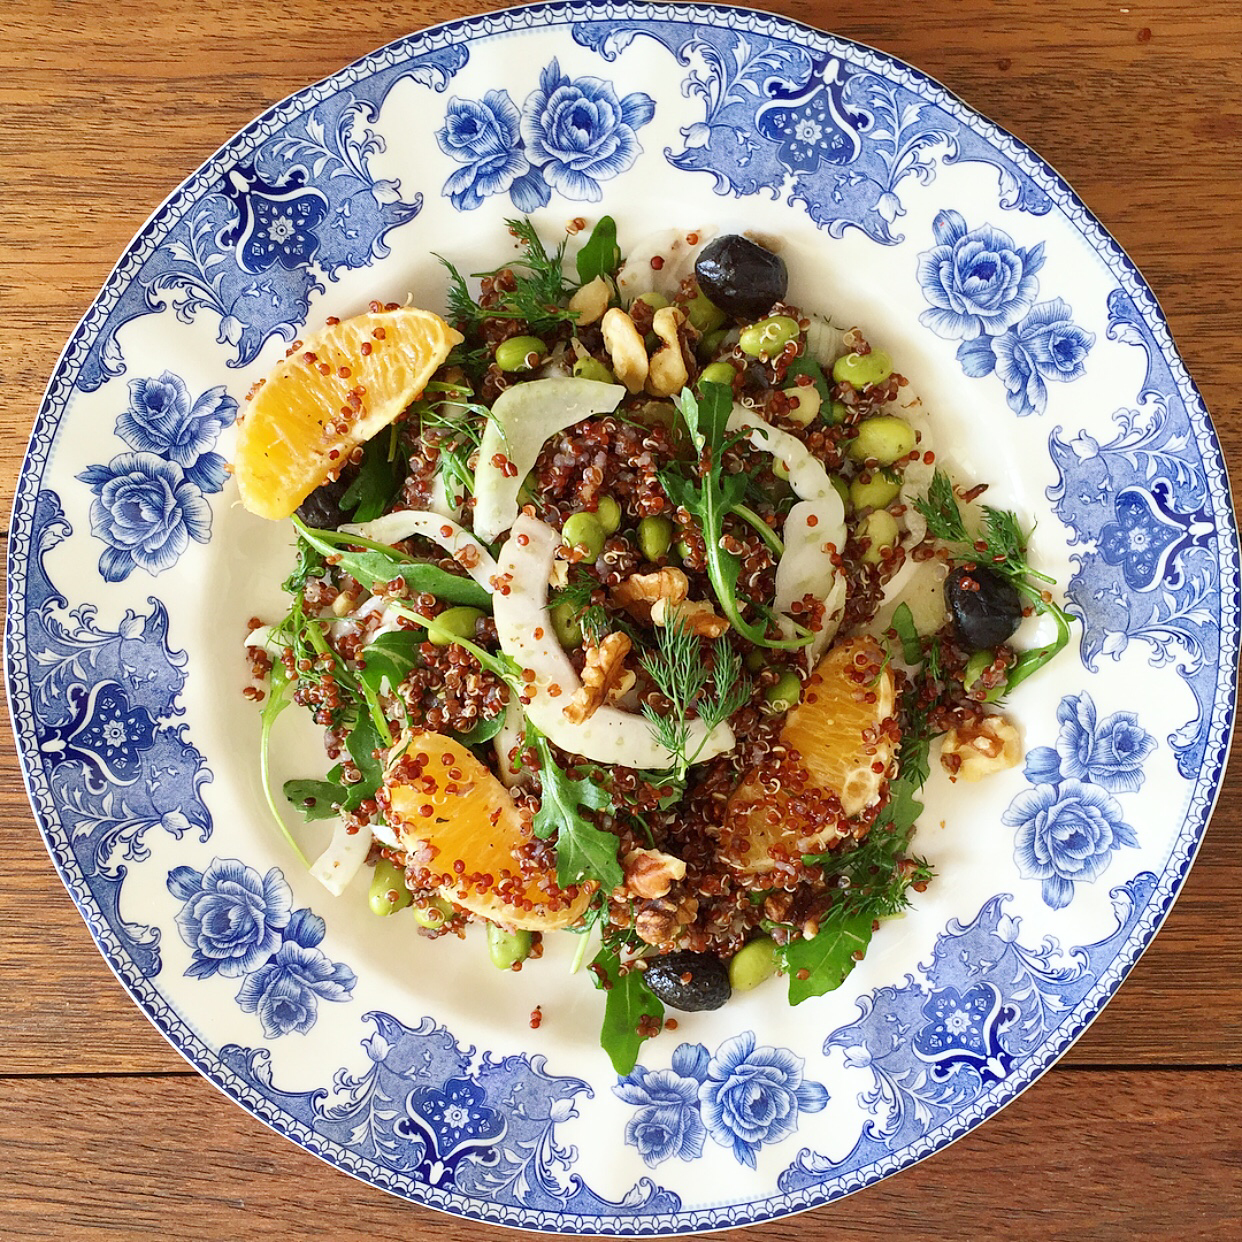
Quinoa Salad with Edamame, Orange & Fennel

This is the first in a new series of bargain recipes. Each salad cost approximately $2.75 using all organic produce. In LA I would say a salad like this would cost $12-14 at a cafe so making it at home is a big money saver!  It’s a hearty and flavorful winter dish using the best ingredients of the season. I love it because it’s really high in protein; both quinoa and edamame are complete proteins. All of the veggies means it has lots of vitamins and fiber so it’s really filling and energizing too. It’s one of those clean eats meals that’ll help you get back into your skinny jeans after the holidays 😉

 You can make a bigger batch of the quinoa and edamame then freeze the leftovers to use later as a quick base for a meal. Just freeze it in a 1-inch layer in a freezer zip-lock. It will keep for months. When you’re ready to thaw, place a bag in the fridge overnight or reheat the frozen quinoa directly in a sauce pan with a couple of tablespoons of water until warm. It’s a great time saving idea to make a little extra when you cook grains so you always have some ready to go in the fridge or freezer. Enjoy! Jacq

Ingredients: 4 servings

Salad:
1 cup Red Quinoa
1 tsp each Sea Salt & Black Pepper
1/2 tsp herb d' provence
1 cup shelled Edamame, frozen
1/2 small Fennel Bulb + Fronds
1/2 cup fresh Dill, Chopped
2 Oranges
1 1/2 cups Arugula
16 Black Olives
16 Walnut Halves, crumbled

Dressing:
Juice of 1 Orange
1 1/2 Tbsp Olive Oil
1 Tbsp Red Wine or Balsamic Vinegar
1/2 tsp Dijon Mustard
Big pinch each Sea Salt, Black Pepper, Herb d' Provence

1. Rinse quinoa using a fine mesh sieve and drain well. In a small pot add quinoa and seasonings to 2 cups water and bring to a boil over high. Once boiling add frozen edamame and bring back up to boil, then lower to a simmer on medium-low and cover.

2. Meanwhile thinly slice the fennel bulb. Roughly chop the fronds and dill. Peel and separate oranges into segments. Make Dressing by whisking all of the ingredients together.

3. Check quinoa after 15 minutes, the grains should be tender and it should appear that they have sprouted little tails. If not, cover and cook a few minutes more. When ready, remove from heat and let sit 5 minutes covered before fluffing. If there is extra water on the bottom, allow to cook uncovered for a couple of minutes before covering and allowing to rest.

4. You can serve this warm or if you would like your quinoa to be chilled, spread it in a thin layer on a large plate and stick in the freezer for 10 minutes. Toss the quinoa with the remaining ingredients and dressing. Divide onto 4 plates and serve immediately. If you are not eating it all at once you can toss everything except the arugula and refrigerate, then add the arugula just before serving.